 HextaUI
Styling Vercel's UI SDK with Tailwind: data-slot, state attributes and enter/exit animations
Style Vercel's new UI SDK with Tailwind v4 and shadcn tokens: data-slot, state attributes, CSS variables and enter and exit animations on four components.
Preet Suthar · · 9 min read
- React
- UI SDK
- Tailwind CSS
- shadcn/ui
Vercel Labs published UI SDK to npm on 12 November 2026. It is a set of unstyled, accessible components for React, Vue, Svelte, Solid and Web Components, built on a core library of behaviors. The components handle focus, keyboard and ARIA. How they look is your job.
This post styles four of them with Tailwind CSS v4 and shadcn-style theme tokens: a Select, a Popover, a Rating and a Color Picker. Each one shows a different styling hook. Every snippet below runs in a scratch app built with Vite 8, React 19.3, Tailwind CSS 4.3 and @ui-sdk/react and @ui-sdk/core at 0.1.0-beta.1. UI SDK is in beta, and its docs say APIs may still change, so check the version you install.
How styling works in UI SDK
UI SDK has three layers. @ui-sdk/core holds behaviors such as roving focus, typeahead and popups. A primitive, written with definePrimitive, combines behaviors with state and named slots. A framework adapter such as @ui-sdk/react renders each slot as a part you import, like SelectTrigger or RatingItem.
- Behaviors
@ui-sdk/coreFocus, keys, selection, popups, drag and drop. - Primitive
definePrimitiveState, an API and named slots in one definition. - Parts
@ui-sdk/reactEach slot renders withdata-slot, state attributes and CSS variables. - Your styles
classNameTailwind utilities or plain CSS that target those hooks.
<div data-slot="select-item" data-highlighted data-selected role="option">
className="data-highlighted:bg-accent data-selected:font-medium"
Your styles attach to the parts through three hooks:
data-slot: every part has one, such asdata-slot="select-item". It names the part for global CSS and for agents.- State attributes:
data-open,data-highlighted,data-selected,data-disabledand so on. Most are present or absent. Some carry a value, likedata-side="top"ordata-orientation="vertical". - CSS variables: values a class can't express, like
--anchor-widthon a popup or--rating-fillon a star.
className and style can also be functions of a part's state, the way Base UI allows. With Tailwind you rarely need that, because v4 has a variant for any data attribute: data-highlighted:bg-accent applies while data-highlighted is present.
The docs ask you to style these attributes rather than generated IDs, which can change. Each component page has a Styling section and a Data Attributes section that list exactly what each part exposes. That list is the contract.
Set up Tailwind v4 and the ui-sdk layer
UI SDK needs a little CSS of its own, for example to keep a closed popup hidden. It adds that CSS at runtime in a cascade layer named ui-sdk. Declare the layer first in your global stylesheet, above the Tailwind import, so your styles win wherever the page inserts the runtime CSS:
The full token list is the one shadcn/ui generates, with a .dark block that overrides the same names. I trimmed it here. Nothing in UI SDK reads these tokens. They only matter because the classes below use them, which means a UI SDK component and a shadcn/ui component can share one theme.
There is no provider to mount and no stylesheet to import from the package. If you use a Content Security Policy without 'unsafe-inline' for styles, read the CSP section of the Styling and Animation guide, because the runtime CSS needs a nonce or constructed style sheets.
Select: state attributes and an animated list
A Select has a label, a trigger, a value, a content popup and items. This one shows a role picker with a check mark on the chosen item and a short scale-and-fade when the list opens and closes:
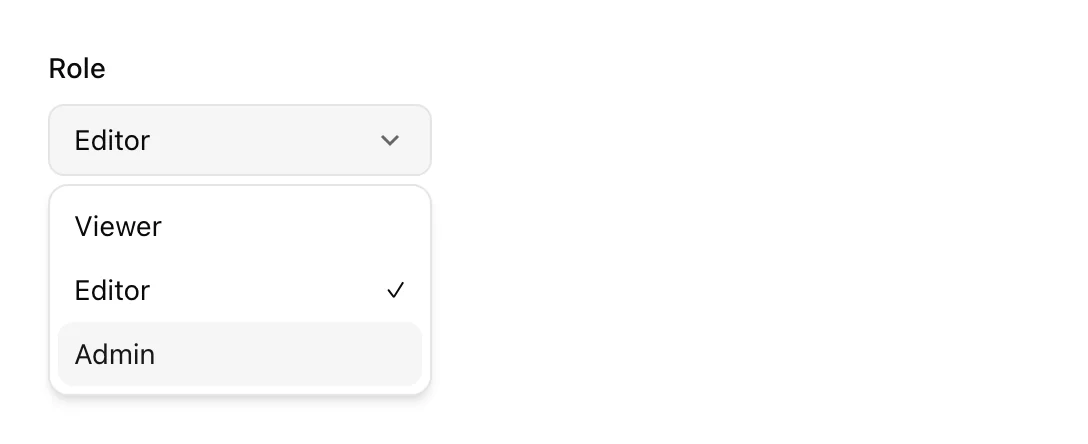
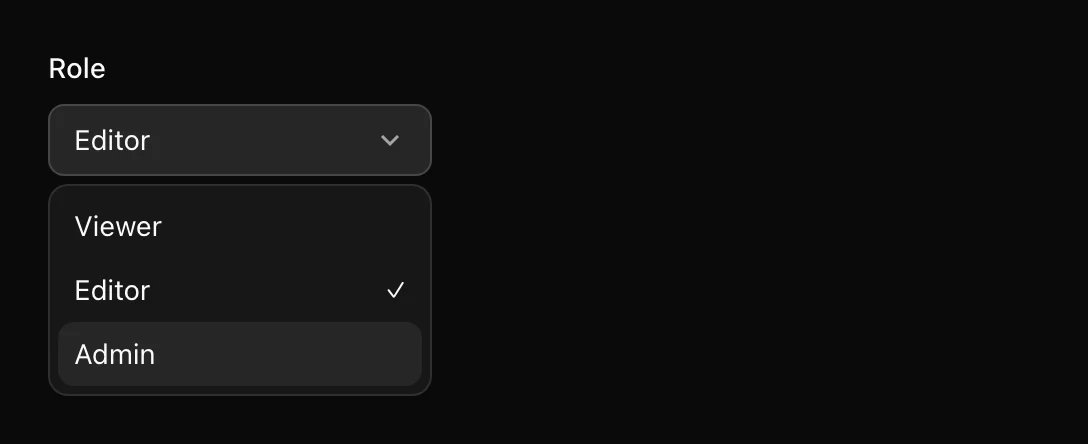
What each class reads:
data-open:bg-accentkeeps the trigger tinted while the list is open.data-placeholder:styles the trigger while nothing is selected. With a default value it never applies here, but it costs nothing to keep.min-w-(--anchor-width)makes the list at least as wide as the trigger. Tailwind v4 writes a CSS variable value as(--name), withoutvar().origin-(--transform-origin)scales the list from the side it opens on. UI SDK sets that variable on the content.data-highlighted:marks the item under the pointer or keyboard focus. Selected items getdata-selected, andSelectItemIndicatoronly renders inside a selected item.
Passing items is optional, but the docs recommend it: the trigger can show the selected label before the list renders, and the agent bridge can read the choices while the list is closed.
If you need to tell keyboard highlight from pointer highlight, the content has data-modality="keyboard" or "pointer". A focus ring that only shows for keyboard users is in-data-[modality=keyboard]:data-highlighted:ring-2 on the item.
The popup lifecycle
The animation above uses two attributes that exist only during a transition. The content gets data-starting-style for its first frame, so a transition has a state to start from. When it closes, it gets data-ending-style and stays mounted until the transition or animation finishes.
- ClosedNot in the page
- First frame
data-opendata-starting-styleStyle the state you animate from - Open
data-openTransitions to its normal styles - Closing
data-closeddata-ending-styleStays mounted until the exit finishes - UnmountedOr hidden, with keepMounted
Three details make this work in practice.
First, put exit styles on data-ending-style, not on data-closed. data-closed describes the state, but the docs are explicit that it does not keep the element around for an exit.
Second, UI SDK popups use the browser's top layer. The content renders in place, as a child of the component, and the browser lifts it above the page. In my scratch app the open content carried popover="manual" and matched :popover-open. There is no Portal or Positioner part, and z-index does not decide whether it sits above a sticky header.
Third, if an animation library such as Motion needs closed content to stay in the DOM, set keepMounted. onOpenChangeComplete runs after the open or close finishes, including the animation.
Popover: a faster exit than entry
Entrances and exits do not need the same timing. A popover that slides in over 200ms and fades out over 100ms feels quicker than one that takes 200ms both ways. Because the exit has its own attribute, Tailwind can give it its own duration:
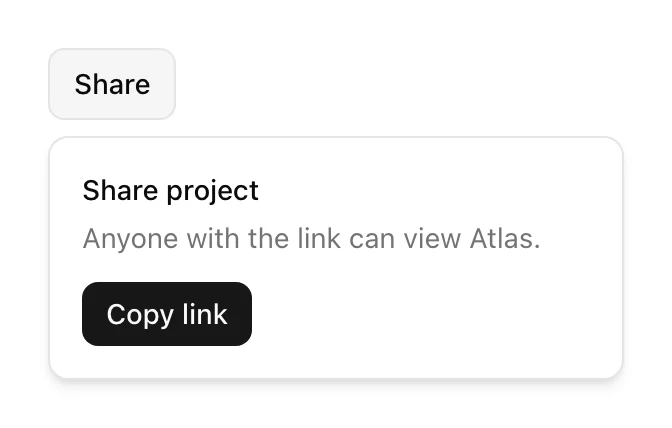
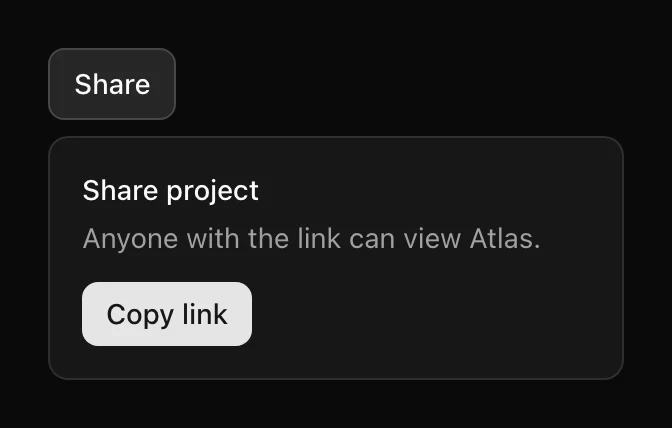
The entrance moves from -translate-y-1, scale-95 and opacity-0 to the resting state. The exit only scales and fades, with data-ending-style:duration-100. motion-reduce:transition-none turns both off for people who ask for less motion, and the popover still opens and closes.
PopoverTitle and PopoverDescription matter beyond looks. The content is a dialog, and these parts give it an accessible name and description. Without a title, give the content an aria-label.
Rating: style the fill, not the stars
A Rating is a radio group drawn as stars. You render one RatingItem and the Rating repeats it for each star. Each item reports how much of its star the shown score covers in --rating-fill, from 0 to 1. data-filled marks whole stars, data-partial marks the star a half score ends in, and data-highlighted marks the stars up to a score the pointer previews.
--rating-fill lets half stars come from one gradient instead of two icons:
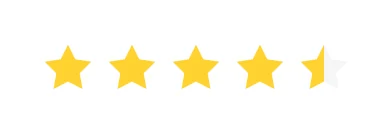
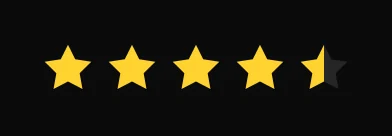
With step={0.5}, each half star is its own radio, named "3.5 stars" and so on. The radios are buttons that the Rating places over your icon with inline styles, and the item gets position: relative the same way. That is why the span can use absolute inset-0 without any extra class.
Keyboard works without any work on your side. Focusing the checked star and pressing the right arrow moved the score from 3.5 to 4 in my test, and the fill followed.
Keep the mask off the focusable item
My first version put the star mask on RatingItem itself. It looked right until I tabbed in: a CSS mask clips everything the element paints, outlines included, so the focus ring disappeared. Moving the mask to an inner span fixed it. The item keeps its rounded outline through has-focus-visible:, and [&_button]:outline-none hides the browser's default ring on the half-width radio button inside, which otherwise draws a thin box around half a star.


This is not specific to UI SDK, but icon-shaped masks are a common way to draw ratings, so it is worth checking with the keyboard before you ship.
Color Picker: CSS variables do the drawing
The Color Picker exposes the most variables of the four. Every part writes the current color as --color-picker-color. The area gets --color-area-background, a set of gradients for its two channels, and each slider gets --color-slider-background. Your classes give the parts a size and use those variables as backgrounds.
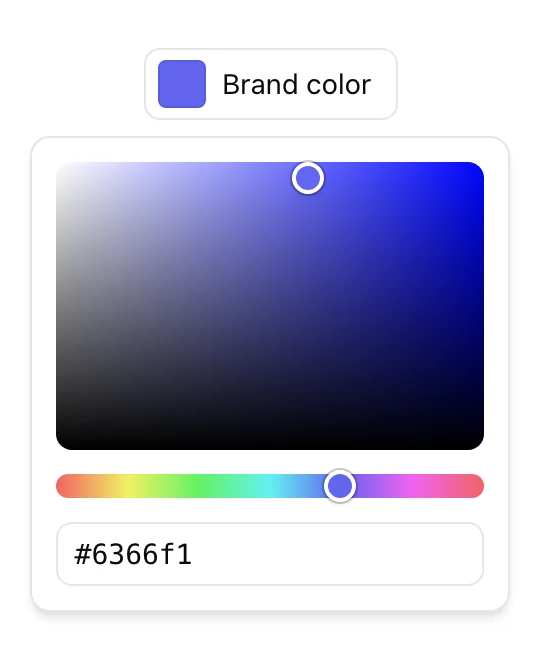
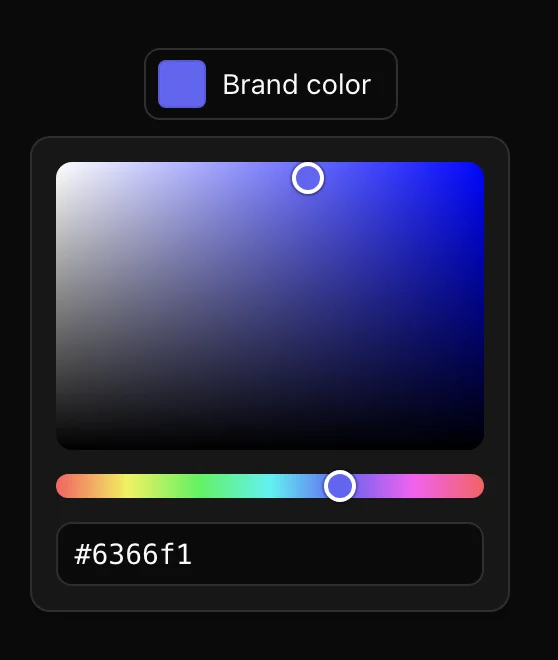
Things worth knowing before you copy this:
- The Popover goes inside the ColorPicker. The parts in the popup and the swatch in the trigger then edit and show the same color.
bg-(image:--color-area-background)is Tailwind v4's type hint. Withoutimage:, Tailwind would read the variable as a color, and gradients would not paint.- The thumbs get
position: absoluteand their place in percent as inline styles. Your class only needs to centre each thumb on its point, which is what-translate-1/2does. The slider thumb also needstop-1/2, because its inline style only sets the position along the track. - The swatch is an image to screen readers, named after the color. In my build it was announced as "vivid purple" for
#6366f1. Name the trigger yourself, because the visible text alone may not say what the color is for. - For OKLCH, add
ColorPickerAreaCanvasinside the area. A gradient can't draw OKLCH's gamut edge, so the canvas paints it pixel by pixel.
Styling by data-slot in plain CSS
Utility classes on every part are one option. The other is a stylesheet keyed on data-slot, which keeps markup short and puts a component's look in one place:
The UI SDK docs style their own demos with plain CSS too. It works because data-slot is one of the attributes a part always keeps: the docs list it next to roles and tabindex as managed attributes that your props can't override. In a shadcn/ui-style project, where each component file wraps the parts and adds its own classes, utilities on the parts are usually simpler. A plain-CSS theme is easier to swap wholesale.
Moving shadcn-style classes from Radix or Base UI
If your components come from shadcn/ui, most of your classes carry over. The differences sit in a few attribute names and in the popup structure.
| Concern | Radix | Base UI | UI SDK |
|---|---|---|---|
| Open state | data-[state=open]: | data-open: | data-open: |
| Enter styles | keyframes on data-[state=open] | data-starting-style: | data-starting-style: |
| Exit styles | keyframes on data-[state=closed] | data-ending-style: | data-ending-style: |
| Transform origin | --radix-popover-content-transform-origin | --transform-origin | --transform-origin |
| Trigger width | --radix-popover-trigger-width | --anchor-width | --anchor-width |
| Popup parts | Portal, Content | Portal, Positioner, Popup | Content only |
Coming from Base UI, the attribute names for popups are the same, so the class strings mostly paste across. You delete the Portal and Positioner wrappers and move placement props such as side, align and sideOffset onto the content. Coming from Radix, you replace data-[state=…] variants and keyframe animations with the starting and ending attributes. Either way, check each component's Data Attributes list, because names that look shared can differ. Base UI's Select, for example, has its own attribute set, and so does UI SDK's.
The comparison of the three libraries as a whole, beyond styling, is in UI SDK vs Base UI vs Radix.
What tripped me up
A short list, so you don't repeat it:
- Styling
data-closedfor an exit. Nothing animates. Usedata-ending-style. - Forgetting
@layer ui-sdk;. Without it first, the runtime CSS can land after your styles in the cascade. - Masks on focusable parts. They clip the focus outline. Mask an inner element.
- Reading
--available-heightfrom a child. The docs note it doesn't inherit. Copy it on the popup, for example[--list-height:var(--available-height)], and readmax-h-(--list-height)below. - Gradients from variables. Use
bg-(image:--name), notbg-(--name).
UI SDK is a beta, one day old at the time of writing. Everything here worked as documented in 0.1.0-beta.1, and the attribute lists in the bundled docs at node_modules/@ui-sdk/react/docs/ match what the components rendered. HextaUI is working on a styled UI SDK flavor of its components, separate from the Base UI one, and this post is what I learned building the first pieces.